
Thursday, 20 October 2016

Nails Trimming
How to Clip/Trim a Budgie's Nails?
A budgie claws, if not kept clipped, can quickly get out of hand. If they
get too long, they can begin to curl downward, and grow into the bird's feet,
causing him severe pain and discomfort. That is why it's very important to stay
on top of your budgies claws. Some may prefer to take their bird to a
professional, but I've found that it's much quicker and cheaper to do it at
home. Here's how.
What You Will Need
1. You will need a washcloth. This will be used to help you hold the budgie. It will protect you from being bitten, and it will help to keep the budgie calm.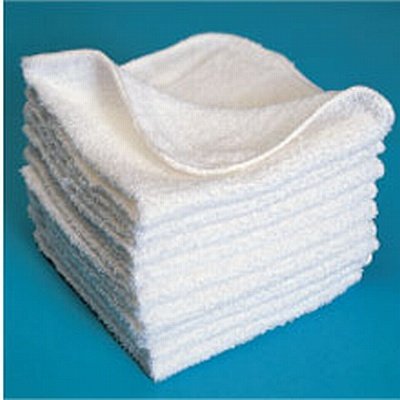
2. You will need a pair of clippers. If you don't already have these, they can be found at any pet store.


3. You may need a helper. While it's not absolutely necessary, it will be a great help to have someone else hold the budgie while you clip his claws. Eventually, you will learn to do it by yourself, but for now it's wise to have some help.
Step One
Before you begin clipping your budgie claws, you will need to secure him safely and comfortably in a washcloth. To do this, place a clean washcloth over your budgie, and grab him around his back with your hand.
He will probably squawk a lot.
This does not mean you are hurting him, as long as you aren't squeezing too hard. This is not exactly fun for him to be confined like this, so he'll be in a bit of distress.
Step Two


What if You Cut a Vein?
If you accidentally cut a vein, don't panic! Your budgie will be just fine. Put some cornstarch (baby powder) or some flour in the palm of your free hand, and dip the bleeding nail in it. It will help stop the bleeding. It will heal and your budgie will be okay!Step Three
After you've clipped all of your budgie's claws, you're finished! Simply release him from your grasp. He will recover very quickly from any stress he may have been experiencing just moments ago. You will need to repeat this process every time you notice his claws getting too long. I have to clip my budgies claws every couple of months, or so. It just depends on how fast they grow, and how well they are being filed down naturally between clippings. If this seemed a little bit scary, don't worry. It will get easier every time you try. You will get more comfortable with the process, and become more confident that you won't hurt your budgie. Just keep at it. If you have any questions or run into any problems, give your local veterinarian a call for some advice. Also, shoot me a comment. I've done this hundreds of times and would be happy to answer any questions you may have. Good luck!
Tuesday, 18 October 2016

Breeding Info:-
Selecting a Pair:-
Both the male and female you wish to breed should be at least one year old.
Selecting a pair that is already bonded will help ensure a shorter time until they begin to mate and lay eggs.
How to detect gender of budgies for making couple?
 Set-up:-
Each pair should be set up in their own cage at least 24″w x 16″d x 16″h (70x40x40cm). The cage should not have a grate on the bottom. If the cage has an irremovable grate, place the newspaper lining on top of the grate. Use only black and white newspaper to line the bottom.
 A wooden nest box should be attached outside of the breeding cage.
A wooden insert with a concave circle should be in the bottom of the nesting box to prevent splayed legs.
It is very important to have a cuttlebone and mineral block in the cage. An iodine salt spool is also recommended.
 Food and water dishes should be provided. I recommend attaching two
water tubes, especially after all the babies have hatched. I also
recommend putting a large jar feeder on the cage floor. The parents will
go through a lot of seed and water when caring for a nest full of
growing chicks.
Food and water dishes should be provided. I recommend attaching two
water tubes, especially after all the babies have hatched. I also
recommend putting a large jar feeder on the cage floor. The parents will
go through a lot of seed and water when caring for a nest full of
growing chicks.
 Pieces of soft wood for the female budgie to chew on will satisfy her
need for gnawing and also can help get her into the mood to breed. Be
sure the wood is safe for birds by buying this material at a bird or pet
store.
Pieces of soft wood for the female budgie to chew on will satisfy her
need for gnawing and also can help get her into the mood to breed. Be
sure the wood is safe for birds by buying this material at a bird or pet
store.
If only breeding one or a couple of pairs, you will need a large cage to put the babies into when they are weaned. If breeding large scale, you will need to build a flight cage to keep non-breeding budgies and newly weaned babies.
 Environment:-
It is better to start out with 2 or 3 pairs, because they help stimulate each other into the breeding mode. Also, if something goes wrong with a pair, you would be able to foster out the chicks under another pair.
Most comfortable temperatures to keep them in is 65 to 75 degrees Fahrenheit (18 to 24 degrees Celsius).
 Some humidity helps the eggs to hatch better:-
They need good light, but not direct sun during the day. They need 12 hours of darkness with cage covered at night. Try to go by the sun; cover the budgies at sundown and uncover them around 6 to 7 AM each morning.
 It is important to use a full-spectrum light bulb in the breeding room to
assist in vitamin-D formation and to allow for proper vision.
It is important to use a full-spectrum light bulb in the breeding room to
assist in vitamin-D formation and to allow for proper vision.
Budgies need to have a comfortable environment and to be healthy and happy to breed.
Proper Care of Breeding Pairs:-
Budgies need a very good diet when breeding.
Enriched variety of parakeet seed mix.
A supplement of pellets for parakeets either in an individual dish or mixed with seed.
A powdered vitamin supplement added to food (not water).
Organic fresh greens should be provided daily. Examples are dandelion leaves or carrot-tops. All produce must be organic! Even a tiny amount of pesticides are enough to kill a baby chick. Bits of shredded carrots are good too. Also give them little tiny bits of cooked chicken or eggfood for protein, but only when breeding. The better variety of good foods you feed, the healthier the chicks will be.
Try not to interfere too much with the breeding birds. Have a regular routine when you clean the cage. Keep the breeding cages very clean.
 Change the food and water each day. Check the food and water levels both in
the morning and night.
Change the food and water each day. Check the food and water levels both in
the morning and night.
Nest boxes should be checked once per day, preferably when the hen comes out to poop and stretch her wings. Remove broken egg shells or any dead chicks right away.
Budgie pairs will try have a third clutch, right after the first two, in one breeding season. However, if they have successfully reared chicks from the previous two clutches, they should be stopped from starting the third clutch for health reasons, to prevent burnout, weak chicks, etc. Also, the pair should be rested for a whole year until next breeding season. To stop a pair, remove the mother from the cage when the youngest chick is about 10 days old. The father will take over the care of the chicks. Watch them closely for the first 48 hours, as it sometimes takes a day or so for Dad to realize that Mom isn’t coming back and he needs to take over.

Proper Care of the Chicks
If you need to handle the eggs, be sure to completely clean your hands with soap and water before handling. Bacteria from your hands can be absorbed through the shell which can harm the baby.

When the youngest chick hatches the oldest chick will be much bigger than it, especially with large clutches of more than 5 eggs. When you check the nest box make sure the youngest chicks are not getting trampled and are getting fed (you will see food in their crops). If you notice any problems, you can try fostering the youngest chicks to another pair with similarly aged chicks. You may also try fostering newly hatched chicks to a pair with eggs. Most of the time a fostered chick is accepted. Check often on a fostered chick to make sure. If you see food in the baby’s crop, the pair has accepted him. If the clutch is very large, with more than 6 eggs, you may want to foster the 7th and on chicks automatically.
When the babies start getting feathered, it will be about time to start cleaning the nest box. If you notice a large build-up of soiled shavings and the babies tend to be getting a lot of droppings stuck to their feet, start changing the bedding about once a week, or as needed. Remove the babies into a large bowl lined with a towel and scoop out the soiled bedding.

Scrape the wood insert as needed and replace with fresh bedding. You may need to block the entrance to the nest box while you do this to prevent the hen from coming into the box.
Check the babies everyday for fixable developmental problems.
Check under the top mandible (beak) for a build up of food, which can cause an undershot beak. If you notice food stuck under the top mandible, remove gently and carefully with a toothpick.
Make sure the chick isn’t developing splayed legs. If this is happening, try adding extra pine shavings. If a young baby develops splayed legs, the problem can be corrected because their bones are still forming. You will have to tie the legs close together to facilitate proper development.
When the chicks start coming out of the nest, provide a shallow dish of food on the bottom of the cage to facilitate weaning.
 You can remove a 6 week old weaned chick from
its parents in the breeding cage. It should be put in a large cage reserved for
young birds or in the flight cage. Provide lots of food, available in different
places, especially in a dish on the bottom of the cage. Keep a close eye on
newly removed chicks to make sure they are eating. Check their crops to make
sure they are full before covering their cage at night.
You can remove a 6 week old weaned chick from
its parents in the breeding cage. It should be put in a large cage reserved for
young birds or in the flight cage. Provide lots of food, available in different
places, especially in a dish on the bottom of the cage. Keep a close eye on
newly removed chicks to make sure they are eating. Check their crops to make
sure they are full before covering their cage at night.
Development and What to Expect
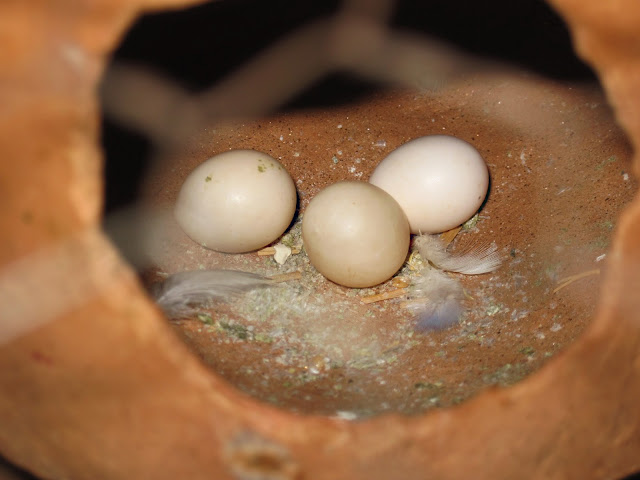
When the hen starts to lay eggs, she will lay an egg every other day. A clutch of eggs is normally anywhere from 4 to 6 eggs, but sometimes 8 or more.
 A new hen may not start to brood the eggs until the second or even third egg
is laid. This is fine and will not harm the eggs’ viability. It takes 17 to 20
days for the eggs to hatch.
A new hen may not start to brood the eggs until the second or even third egg
is laid. This is fine and will not harm the eggs’ viability. It takes 17 to 20
days for the eggs to hatch.
You can watch the babies develop within the egg! Purchase a very small flashlight such as the Maglite Solitaire. In a darkened room, shine the flashlight into one end of the egg. In a fertilized egg,
 you can see the embryo
develop. It is the small red kidney shaped thing attached to the wall of the
egg among the blood vessels. You can even see its heart beating if you look
closely.
you can see the embryo
develop. It is the small red kidney shaped thing attached to the wall of the
egg among the blood vessels. You can even see its heart beating if you look
closely.
The babies will hatch every other day in the order they were laid (the first two may hatch on the same day if the hen didn’t brood until the first two were laid). When the youngest chick hatches, the oldest chick may be much bigger than it.
 The babies hatch featherless. They develop down, then pin feathers. The pin
feathers will open as the chick develops. To see pictures of budgie chicks, see
The Budgie and Parakeet Place Photo Album.
The babies hatch featherless. They develop down, then pin feathers. The pin
feathers will open as the chick develops. To see pictures of budgie chicks, see
The Budgie and Parakeet Place Photo Album.
The male will feed the hen, and the hen feeds the chicks, youngest first, until they are about 3 weeks of age. Then the male takes over some of the feeding until the chicks are weaned, which is around 5-6 weeks of age.
If you want the chicks to be tame
 , handle them each day for 10 minutes once
they turn 2 weeks of age. Make sure your hands are clean and warm. Also shield
the chick’s eyes from bright light as the nest box that they are in is dark
inside. This protects their eyes until they are ready to venture out on their
own, which can occur anywhere from the age of 3 1/2 to 4 weeks. After that you
can take them out for longer periods of time and work on finger training them.
, handle them each day for 10 minutes once
they turn 2 weeks of age. Make sure your hands are clean and warm. Also shield
the chick’s eyes from bright light as the nest box that they are in is dark
inside. This protects their eyes until they are ready to venture out on their
own, which can occur anywhere from the age of 3 1/2 to 4 weeks. After that you
can take them out for longer periods of time and work on finger training them.
Record Keeping and Banding
A breeding record should be kept each breeding season. A notebook or ledger can be used for this, as well as breeding cards. Your records should include a log for each clutch of every pair and should include the following:
The band number and variety of both parents
The date each egg is laid
The date it hatches
Each chick’s band number and variety/description
What happened with the chicks, and if sold, contact information of the buyer
You can keep track of the eggs (which clutch and order laid) by marking them lightly with a pencil.
Banding the babies makes them easier to keep track of them as a breeder. It also allows for legitimate recognition by the
Banding should be done when the chick is approximately 6-10 days old, before they develop pin feathers. The chick’s bones are still soft so it will not be damaged when the band is put on. The foot should be big enough so that the band does not slip off or back down onto the foot. The foot should also not be too big so that the chick would clearly be injured by the placement of the band.
How to band a chick:
It is best to band the chick when its crop is empty to prevent aspiration.
It may help to use an antibacterial ointment such as Neosporin to lubricate the foot the band will be slid over. This also helps if any abrasion occurs. You will need to grab the ends of the toes, so try not to get the ointment there.
Hold the chick firmly in one hand, using that same hand to hold the chick’s leg back with toes pointed. Usually extending the leg back (towards the tail) will cause it to unclench its foot and point its toes. Do not extend the leg into any unnatural position.
Hold the three longest toes together and carefully slide the band on, over the ball of the foot, onto the leg. If the shortest toe is still stuck in the band, you can use a toothpick or banding utensil to free it.
To prevent egg binding it is very important to have a cuttlebone and mineral block available in the breeding cage. It is important to regularly check if the cuttlebone and mineral block have been used up. If so, they need to be replaced immediately. If a breeding pair does not touch the cuttlebone or mineral block, another calcium supplement may be necessary, such as oyster shell.
Failure to Lay Eggs
A failure to lay may be the result of the cock or the hen being out of breeding condition. Not only do they need to be at least one year old, but their condition, including hormones, must also be right to breed.
If the pair does not lay after three weeks, consider taking them out of the breeding cage and trying another pair, or repairing them with different mates.

Infertile Eggs
One possible cause for infertile eggs is that the hen laid the first clutch too soon, before the cock mated with her. Try blocking off the nest box for a few weeks, then allow her to lay a second clutch and see if they have better luck.
If the male is an English budgie, make sure the feathers around the vent are not so long that they cover the vent, preventing insemination. If the feathers are too long, trim them carefully with scissors, leaving the down showing around the vent.
Make sure all the perches are stable and do not wobble or roll.
If the pair produces two clutches of infertile eggs, remove them from the breeding cage and consider trying them with different mates or waiting until a later date to try again.

Eggs Thrown from the Nest
Make sure there is a concave area in the nest so that the hen can sit on all the eggs without any of them getting away.
If the hen is young (one or two years old) refrain from breeding her for another year. Hopefully she will lose the habit with maturity.
If the hen continues to discard her eggs from the nest, replace her eggs with dummy eggs or white marbles. After she incubates these for a week or two, remove them and allow her to lay another clutch hopefully she will have lost her egg-throwing habit.
If egg tossing continues to be a problem, you can use her to foster other chicks, but you won’t be able to breed her.
Cracked or Punctured Eggs
An egg with a crack or puncture will probably kill the baby.
Cracked/punctured eggs are often a result of the hen’s nails being too long.
Nail Trimming.
How to Clip/Trim a Budgie's Nails?
 You can attempt to repair a cracked egg before it dries out by covering
(only the cracked area) with non-toxic clear nail polish. This will often save
the chick.
You can attempt to repair a cracked egg before it dries out by covering
(only the cracked area) with non-toxic clear nail polish. This will often save
the chick.
Unfed Chicks
You can tell a newly hatch chick is being fed by looking at the crop (below the neck) to see if it is full of a milky liquid.
If the hen does not feed the chicks, try putting an older baby from another pair into the nest. The older chick’s cries for food will stimulate the hen to feed her clutch.
 If the young chicks have gone without food, purchase some hand-feeding
formula from a pet store and hand-feed them. If the babies are newly hatched,
you will not be able to use a syringe due to their small size. After cooking up
the formula, dab a toothpick into the mix and then put it into the baby’s beak.
It should eat the formula from the toothpick. Do this until its crop is full.
For more information on hand-feeding, see the article Hand Feeding
Implementation by Wanda Barras.
If the young chicks have gone without food, purchase some hand-feeding
formula from a pet store and hand-feed them. If the babies are newly hatched,
you will not be able to use a syringe due to their small size. After cooking up
the formula, dab a toothpick into the mix and then put it into the baby’s beak.
It should eat the formula from the toothpick. Do this until its crop is full.
For more information on hand-feeding, see the article Hand Feeding
Implementation by Wanda Barras.
Physically Hurt Chicks
Sometimes for unknown reasons one of the parents beats up on one or more of the chicks. If this happens, foster out the chicks into other nests and don’t breed the offending parent again. If the attack occurs in the nest, it was usually the hen. If the attack occurs outside the nest, it was usually the cock.
 Sometimes the hen will pluck the feathers of her chicks. This may be to a
nutritional deficiency. If this happens, provide her with an iodine salt spool.
If this does not help, foster out the chicks to other nests and stop her from
breeding for at least a year. Make sure her diet is better supplemented and an
iodine salt lick is provided if you want to try to breed her again.
Sometimes the hen will pluck the feathers of her chicks. This may be to a
nutritional deficiency. If this happens, provide her with an iodine salt spool.
If this does not help, foster out the chicks to other nests and stop her from
breeding for at least a year. Make sure her diet is better supplemented and an
iodine salt lick is provided if you want to try to breed her again.
Dead Chicks
Sometimes an apparently health chick will end up dead for unknown reasons. Make sure the chicks are being kept in a concave area of the nest to prevent them from wandering or rolling away when they are young and still need the warmth of their mother. Other unknown reasons may have contributed to its death, but unless there are outward signs of injury it is hard to say what happened.
Both the male and female you wish to breed should be at least one year old.
Selecting a pair that is already bonded will help ensure a shorter time until they begin to mate and lay eggs.
How to detect gender of budgies for making couple?
Each pair should be set up in their own cage at least 24″w x 16″d x 16″h (70x40x40cm). The cage should not have a grate on the bottom. If the cage has an irremovable grate, place the newspaper lining on top of the grate. Use only black and white newspaper to line the bottom.
A wooden insert with a concave circle should be in the bottom of the nesting box to prevent splayed legs.
If only breeding one or a couple of pairs, you will need a large cage to put the babies into when they are weaned. If breeding large scale, you will need to build a flight cage to keep non-breeding budgies and newly weaned babies.
It is better to start out with 2 or 3 pairs, because they help stimulate each other into the breeding mode. Also, if something goes wrong with a pair, you would be able to foster out the chicks under another pair.
Most comfortable temperatures to keep them in is 65 to 75 degrees Fahrenheit (18 to 24 degrees Celsius).

They need good light, but not direct sun during the day. They need 12 hours of darkness with cage covered at night. Try to go by the sun; cover the budgies at sundown and uncover them around 6 to 7 AM each morning.
Budgies need to have a comfortable environment and to be healthy and happy to breed.
Proper Care of Breeding Pairs:-
Budgies need a very good diet when breeding.
Enriched variety of parakeet seed mix.
A supplement of pellets for parakeets either in an individual dish or mixed with seed.
A powdered vitamin supplement added to food (not water).
Organic fresh greens should be provided daily. Examples are dandelion leaves or carrot-tops. All produce must be organic! Even a tiny amount of pesticides are enough to kill a baby chick. Bits of shredded carrots are good too. Also give them little tiny bits of cooked chicken or eggfood for protein, but only when breeding. The better variety of good foods you feed, the healthier the chicks will be.
Try not to interfere too much with the breeding birds. Have a regular routine when you clean the cage. Keep the breeding cages very clean.
Nest boxes should be checked once per day, preferably when the hen comes out to poop and stretch her wings. Remove broken egg shells or any dead chicks right away.
Budgie pairs will try have a third clutch, right after the first two, in one breeding season. However, if they have successfully reared chicks from the previous two clutches, they should be stopped from starting the third clutch for health reasons, to prevent burnout, weak chicks, etc. Also, the pair should be rested for a whole year until next breeding season. To stop a pair, remove the mother from the cage when the youngest chick is about 10 days old. The father will take over the care of the chicks. Watch them closely for the first 48 hours, as it sometimes takes a day or so for Dad to realize that Mom isn’t coming back and he needs to take over.
Proper Care of the Chicks
If you need to handle the eggs, be sure to completely clean your hands with soap and water before handling. Bacteria from your hands can be absorbed through the shell which can harm the baby.

When the youngest chick hatches the oldest chick will be much bigger than it, especially with large clutches of more than 5 eggs. When you check the nest box make sure the youngest chicks are not getting trampled and are getting fed (you will see food in their crops). If you notice any problems, you can try fostering the youngest chicks to another pair with similarly aged chicks. You may also try fostering newly hatched chicks to a pair with eggs. Most of the time a fostered chick is accepted. Check often on a fostered chick to make sure. If you see food in the baby’s crop, the pair has accepted him. If the clutch is very large, with more than 6 eggs, you may want to foster the 7th and on chicks automatically.
When the babies start getting feathered, it will be about time to start cleaning the nest box. If you notice a large build-up of soiled shavings and the babies tend to be getting a lot of droppings stuck to their feet, start changing the bedding about once a week, or as needed. Remove the babies into a large bowl lined with a towel and scoop out the soiled bedding.

Scrape the wood insert as needed and replace with fresh bedding. You may need to block the entrance to the nest box while you do this to prevent the hen from coming into the box.
Check the babies everyday for fixable developmental problems.
Check under the top mandible (beak) for a build up of food, which can cause an undershot beak. If you notice food stuck under the top mandible, remove gently and carefully with a toothpick.
Make sure the chick isn’t developing splayed legs. If this is happening, try adding extra pine shavings. If a young baby develops splayed legs, the problem can be corrected because their bones are still forming. You will have to tie the legs close together to facilitate proper development.
When the chicks start coming out of the nest, provide a shallow dish of food on the bottom of the cage to facilitate weaning.

Development and What to Expect
When the hen starts to lay eggs, she will lay an egg every other day. A clutch of eggs is normally anywhere from 4 to 6 eggs, but sometimes 8 or more.

You can watch the babies develop within the egg! Purchase a very small flashlight such as the Maglite Solitaire. In a darkened room, shine the flashlight into one end of the egg. In a fertilized egg,

The babies will hatch every other day in the order they were laid (the first two may hatch on the same day if the hen didn’t brood until the first two were laid). When the youngest chick hatches, the oldest chick may be much bigger than it.

The male will feed the hen, and the hen feeds the chicks, youngest first, until they are about 3 weeks of age. Then the male takes over some of the feeding until the chicks are weaned, which is around 5-6 weeks of age.
If you want the chicks to be tame

Record Keeping and Banding
A breeding record should be kept each breeding season. A notebook or ledger can be used for this, as well as breeding cards. Your records should include a log for each clutch of every pair and should include the following:
The band number and variety of both parents
The date each egg is laid
The date it hatches
Each chick’s band number and variety/description
What happened with the chicks, and if sold, contact information of the buyer
You can keep track of the eggs (which clutch and order laid) by marking them lightly with a pencil.
Banding the babies makes them easier to keep track of them as a breeder. It also allows for legitimate recognition by the
Banding should be done when the chick is approximately 6-10 days old, before they develop pin feathers. The chick’s bones are still soft so it will not be damaged when the band is put on. The foot should be big enough so that the band does not slip off or back down onto the foot. The foot should also not be too big so that the chick would clearly be injured by the placement of the band.
How to band a chick:
It is best to band the chick when its crop is empty to prevent aspiration.
It may help to use an antibacterial ointment such as Neosporin to lubricate the foot the band will be slid over. This also helps if any abrasion occurs. You will need to grab the ends of the toes, so try not to get the ointment there.
Hold the chick firmly in one hand, using that same hand to hold the chick’s leg back with toes pointed. Usually extending the leg back (towards the tail) will cause it to unclench its foot and point its toes. Do not extend the leg into any unnatural position.
Hold the three longest toes together and carefully slide the band on, over the ball of the foot, onto the leg. If the shortest toe is still stuck in the band, you can use a toothpick or banding utensil to free it.
Problems with Breeding:-
Egg binding occurs when a hen who is forming an egg in her uterus does not
have enough calcium to finish forming the egg shell. The shell does not become
hard enough to push out, which causes the hen extreme stress and extreme risk.To prevent egg binding it is very important to have a cuttlebone and mineral block available in the breeding cage. It is important to regularly check if the cuttlebone and mineral block have been used up. If so, they need to be replaced immediately. If a breeding pair does not touch the cuttlebone or mineral block, another calcium supplement may be necessary, such as oyster shell.
Failure to Lay Eggs
A failure to lay may be the result of the cock or the hen being out of breeding condition. Not only do they need to be at least one year old, but their condition, including hormones, must also be right to breed.
If the pair does not lay after three weeks, consider taking them out of the breeding cage and trying another pair, or repairing them with different mates.
Infertile Eggs
One possible cause for infertile eggs is that the hen laid the first clutch too soon, before the cock mated with her. Try blocking off the nest box for a few weeks, then allow her to lay a second clutch and see if they have better luck.
If the male is an English budgie, make sure the feathers around the vent are not so long that they cover the vent, preventing insemination. If the feathers are too long, trim them carefully with scissors, leaving the down showing around the vent.
Make sure all the perches are stable and do not wobble or roll.
If the pair produces two clutches of infertile eggs, remove them from the breeding cage and consider trying them with different mates or waiting until a later date to try again.
Eggs Thrown from the Nest
Make sure there is a concave area in the nest so that the hen can sit on all the eggs without any of them getting away.
If the hen is young (one or two years old) refrain from breeding her for another year. Hopefully she will lose the habit with maturity.
If the hen continues to discard her eggs from the nest, replace her eggs with dummy eggs or white marbles. After she incubates these for a week or two, remove them and allow her to lay another clutch hopefully she will have lost her egg-throwing habit.
If egg tossing continues to be a problem, you can use her to foster other chicks, but you won’t be able to breed her.
Cracked or Punctured Eggs
An egg with a crack or puncture will probably kill the baby.
Cracked/punctured eggs are often a result of the hen’s nails being too long.
Nail Trimming.
How to Clip/Trim a Budgie's Nails?
Unfed Chicks
You can tell a newly hatch chick is being fed by looking at the crop (below the neck) to see if it is full of a milky liquid.
If the hen does not feed the chicks, try putting an older baby from another pair into the nest. The older chick’s cries for food will stimulate the hen to feed her clutch.
Physically Hurt Chicks
Sometimes for unknown reasons one of the parents beats up on one or more of the chicks. If this happens, foster out the chicks into other nests and don’t breed the offending parent again. If the attack occurs in the nest, it was usually the hen. If the attack occurs outside the nest, it was usually the cock.
Dead Chicks
Sometimes an apparently health chick will end up dead for unknown reasons. Make sure the chicks are being kept in a concave area of the nest to prevent them from wandering or rolling away when they are young and still need the warmth of their mother. Other unknown reasons may have contributed to its death, but unless there are outward signs of injury it is hard to say what happened.
Subscribe to:
Comments (Atom)